
We’re all looking for ways to get work done faster. With a few quick clicks, you can navigate NetSuite dashboards, reports and searches faster and more efficiently.
Here are some simple NetSuite shortcuts that can help your team be more productive every day.
Global Search Shortcuts
Global Search is often the quickest way to locate data in NetSuite. Locate the “Global Search” box at the center of the “Oracle NetSuite” header. Global Search stays anchored at the top of every NetSuite page, regardless of the page you are on.
You can quickly navigate to the Global Search field with Alt+G.
There are also several record type prefixes that can be used as search keywords to narrow and optimize search results. A search prefix is made up of some or all letters of a standard or custom record type, plus a colon or caret:
- Case
- Contact (CON)
- Customer (CUS)
- Estimate (EST)
- Item (ITE)
- Job
- Opportunity (OPP)
- Sales Order (SAL)
When using prefixes, add a colon to separate the record from the shortcut search term, and add at least three alphabetic or numeric characters in the search term to narrow your search. Example: CUS: ABC searches for a customer with ABC in the name.
Global Search
![]()
Customer Search
Advanced Global Search Shortcuts
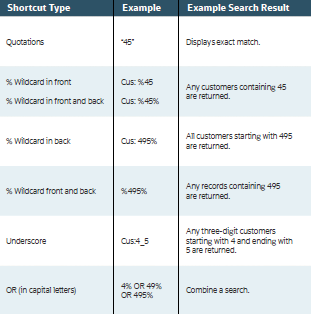
Global Search returns exact matches for numeric keywords to avoid a large number of search results. You can improve your search results by using pattern match functionality.
Advanced Global Search Shortcuts
Keyboard and Dashboard Shortcuts
Date Shortcuts
When editing or completing forms, there are several shortcuts to quickly change dates in any Date field in NetSuite:
- Press t to enter today’s date
- Press y to enter yesterday’s date
- Press T (capital t) to enter tomorrow’s date
- Press m to enter the last day of the month
- Press p to enter the end of the current period (if you use accounting periods)
- Press l (lowercase L) to enter the end of the previous period (if you use accounting periods)
- Press the plus sign (+) to increase one day
- Press the minus sign (-) to decrease one day
Subtab Shortcuts
When using tabbed pages, keyboard shortcuts let you quickly switch among subtabs. Each subtab has a single letter underlined in the title. Press Alt (option on Mac keyboards) and the corresponding letter to switch to that subtab. Example: Alt+S for Shipping subtab in the picture below.
The cursor then appears in the first field on the corresponding subtab.
![]()
Subtab Shortcut
Recent Records
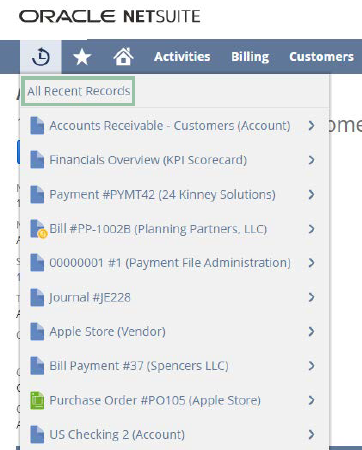
If you’re looking to quickly navigate back to recently accessed information, “Recent Records” displays the last 12 records you viewed. Hover over the recent records icon in the header bar to view a full list of recent records. Click “All Recent Records” to view a full list of recent records. This list includes record type and the date the record was last accessed.
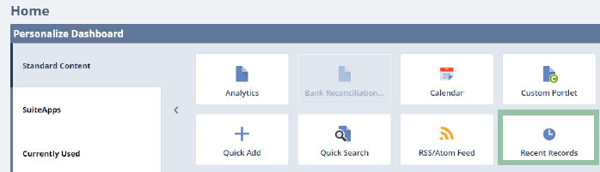
You can also access this information by visiting the “Recent Records Portlet.” This portlet displays a list of records that you have recently created or modified, with links for quick access to those records.
All Recent Records
Recent Records Portlet
Navigation and Shortcut Portlets
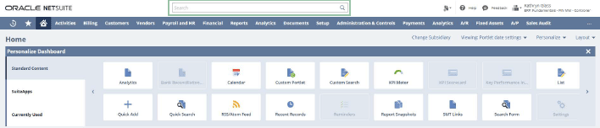
Custom portlets are a valuable tool for customizing your dashboard to optimize navigation. To add custom portlets, click “Personalize” in the upper right corner of your dashboard, or use “Personalize Dashboard” in the “Settings” portlet. On the “Standard Content” tab of the “Personalize Dashboard” palette, click the “Custom Portlet” icon or drag it onto the dashboard.
Navigation Portlet
Use the “Navigation Portlet” SuiteApp to create groups and categories for shortcuts or links you frequently use in NetSuite. The portlet will display any customized groups and categories on your dashboard.
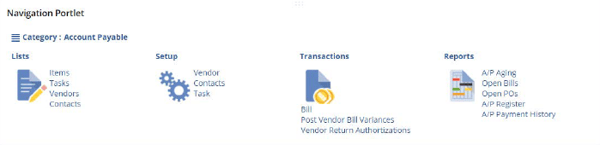
Navigation Portlet
Shortcuts Portlet and Menu
The “Shortcuts Portlet” contains links you can click for easy access to your most frequently used records, transactions, lists and reports.
These same links also appear as options on the “Shortcuts Menu,” indicated by the star icon on the navigation menu.
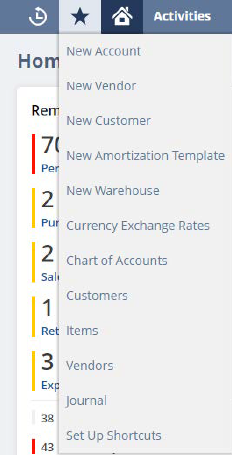
Shortcuts Menu
You can add, remove and change the order of shortcut links in the Shortcuts Portlet and Shortcuts Menu. You can also set up shortcuts to open linked pages in new windows. Any changes you make are applied to both the Shortcuts Portlet and the Shortcuts Menu options.
Adding Shortcuts
There are two methods to add shortcut links to the Shortcuts Portlet:
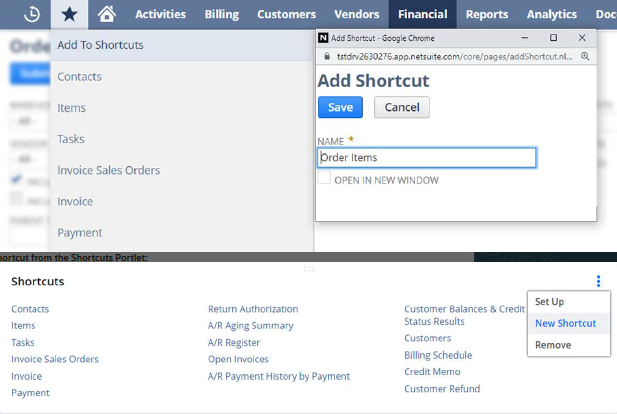
- Mouse over the star icon on the navigation menu and select “Add to Shortcuts”
- Edit the name for the shortcut link
- Check the “Open New Window” box if you want the link to open in a new window
- Click “New Shortcut” on the portlet menu
- Enter a name for the shortcut link
- Enter the URL for the page

Shortcuts Portlet
Shortcuts Menu
Customizing the Shortcut Portlet
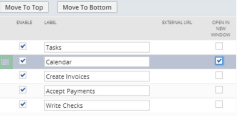
You can customize the Shortcut Portlet by reordering shortcut links that have been added. To navigate to the customization screen, click “Set Up” in the Shortcuts portlet menu or the “Set Up Shortcuts” option on the shortcuts menu. This will open a separate popup window. To reorder, drag the shortcut row where you want it, or use the “Move to Top” or “Move to Bottom” buttons. Click Save.
You can also rename a shortcut link within this window by editing the “Label” field.
Removing Shortcuts
To remove any shortcut within the portlet, open the “Set Up Shortcuts” popup window, then clear the “Enable” box next to each shortcut you want to remove.
Customizing the Shortcut Portlet
Note that “Shortcuts” created when a dashboard was published will appear with asterisks. The publisher may have restricted these shortcuts so that you cannot remove them.
Customizing Email Preferences
To simplify emails sent within NetSuite, you can set up an email profile to determine the following:
- Name that appears in the “From” field
- The From Email Address
- Custom Signature
Name and From Email Address
To customize or update the name and email address for NetSuite emails, navigate to Home > Settings > Set Preferences. To customize the name you want to appear in the “From” field, edit the “Nickname” field. In the “From Email Address” field, enter the email address you want to appear in the “From” field on emails you send and then click “Save.”
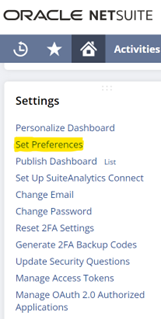
Set Preferences
Custom Signature
In the “Signature” field located in “Set Preferences,” you can enter an email signature using HTML markup. If you are not familiar with working with HTML, the simplest way of creating an email signature containing rich-formatted text, images and links is to use NetSuite’s email editor. You can access the editor either by clicking the Communications subtab > Messages > Email or from the “Email Templates” record. The editor is the same in all cases.
Once in the NetSuite Email Editor, create an email signature by navigating to Documents > Templates > URL Field > Email Templates > New. Enter your signature information directly into the editor.
To add an image to a signature, first make sure the image has been uploaded to NetSuite’s File Cabinet. Open a new browser tab/window and go to Documents > Files > File Cabinet. Locate the required image file and click Edit. Copy the URL, which begins with “https://system.netsuite.com/.”
Return to the email editor and click the image icon. Paste the File Cabinet image URL into the URL field. Input sizing and alignment options as required. Click “OK.” Switch to the editor’s markup view by clicking the DIV icon. Copy all lines of the markup code. Once copied, go to Home > Set Preferences. Clear any existing content from the “Signature” field and paste the copied HTML. Check the “Add Signature” to the “Messages” box and click “Save.”
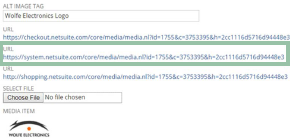
URL Field
Need Help?
If you need help making the most of your experience with NetSuite, contact us online or give us a call at 410.685.5512.
